Okay, lets make some preparation to setup our Penetration Testing Lab.
In this tutorial I use Virtualbox 4.1, Ubuntu-10.04-desktop-i386, Windows XP Professional SP3 and Backtrack 5r1 of course.. :)
Lets get started.
1. Open your Virtualbox
2. Click New
3. The welcome screen will appear, just click "Next"
4. Give the name as you wish. I named this "Windows XP". Then choose the OS Type. Because we want to Install windows xp first make your choice same as the picture below. After that click "Next"
5. Adjust the memory for the system that you want to allocate.
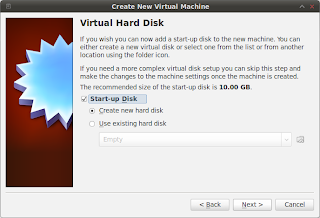
6. In this screen we prompted to make the harddisk for the system. Because the system is new we choose "Create new Harddisk".
7. Choose "VirtualBox Disk Image"
8. After that we must specify the disk attributes. A dynamically allocated disk file will only use space on your physical disk as it fills up, but when the space for that is freed it will not shrink again automatically. And fixed size means the size of the disk is permanent and cannot be expanded. Take longer time to create too, but it is often faster to use. The choice is yours. But I myself take the fixed size.
9. Then adjust the size of the disk.
10. Summary for the disk that we create will appear. Click "Create".
11. Summary for the Windows XP System that we create will appear after that. Click "Create".
12. Okay, Lets install the system to the virtualbox. Hit "Start".
13. First run wizard window will appear. Click "Next".
14. Locate the ISO file of the Windows.
15. Ok. Another summary screen will appear. Click "Start".
16. Installation will begin.
17. Hit Enter.
18. Then F8
19. Install at the available partition. Just hit Enter.
20. Then choose the filesystem for the disk. I choose NTFS.
21. The setup will format the partition.
22. Wait until the setup finished.
23. After finish the installation will restart.
24. At this screen don't press any key. Otherwise you will restart the installation procedure.
25. After restart the installation will continue.
26. When this screen appear just click "Next".
27. Insert the name and the organization for the system.
28. Enter the product key then click "Next"
29. Enter the name for the computer and specify the administrator password.
30. Specify the time zone.
31. Choose Typical for the Network Settings.
32. Click "Next".
33. Wait until the installation finished.
34. After the installation finished it will restart.
35. Do some final touch.
And there you go. Freshly installed Windows XP Professional SP3 in your Backtrack's Virtualbox.


